Revive & Repair

I fix broken stuff!

Last year we moved into a new home near Chicago. It was built in 1948, so naturally we are filling it with refinished mid-century furniture and knick knacks. I have several posts in the works on that subject. For now, I’d like to introduce my latest project: restoring a Firestone radio phonograph from 1941.

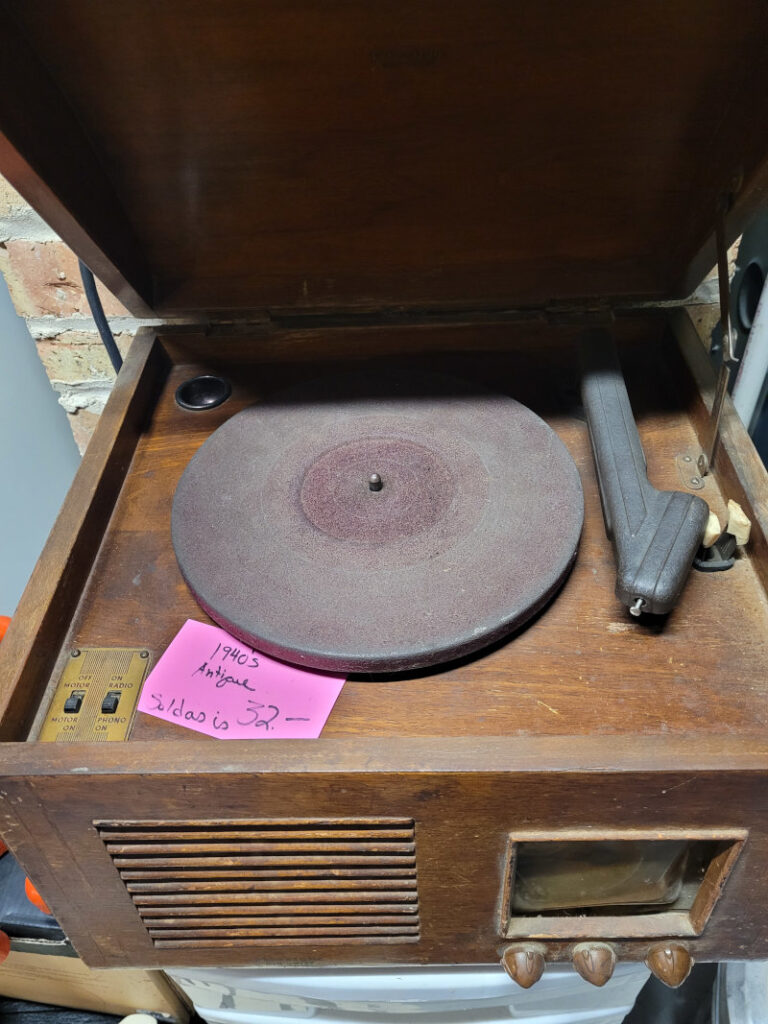
I picked this radio up at our local thrift shop for a whopping $32. I did not test it before bringing it home, but I was so enthralled that I decided I could figure it out later.

Firestone Air Chief record player
Firestone Air Chief cabinet

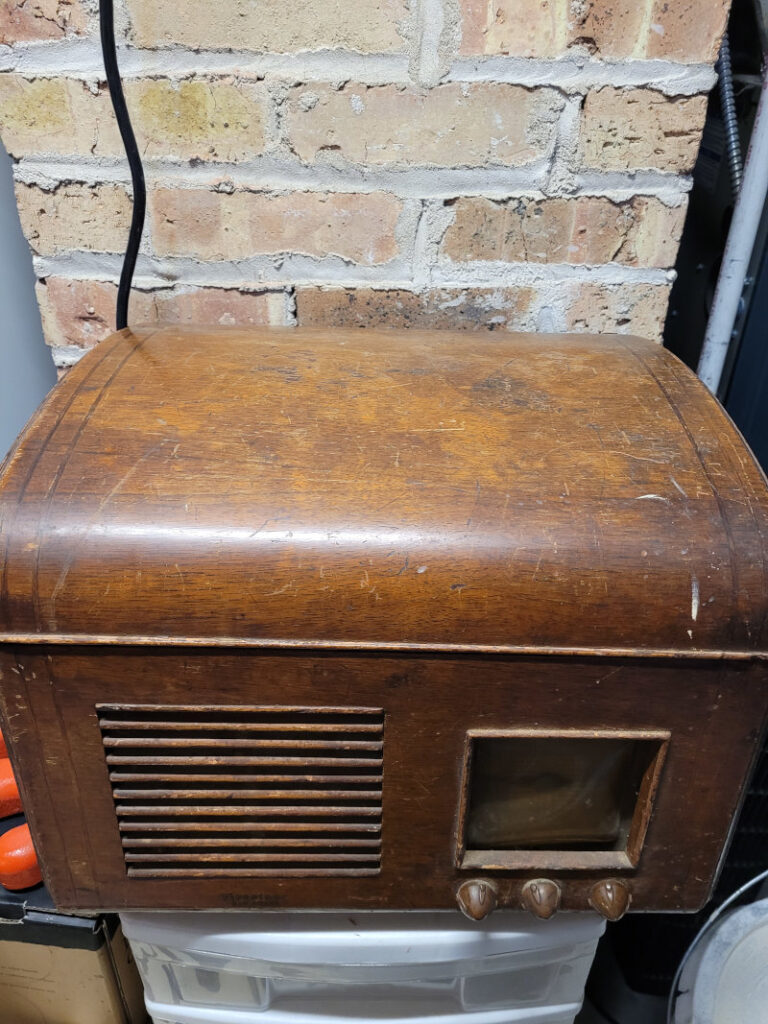
This thing has seen some years. This was not some showpiece kept on a shelf for the neighbors to admire. This radio was used. And I love that.

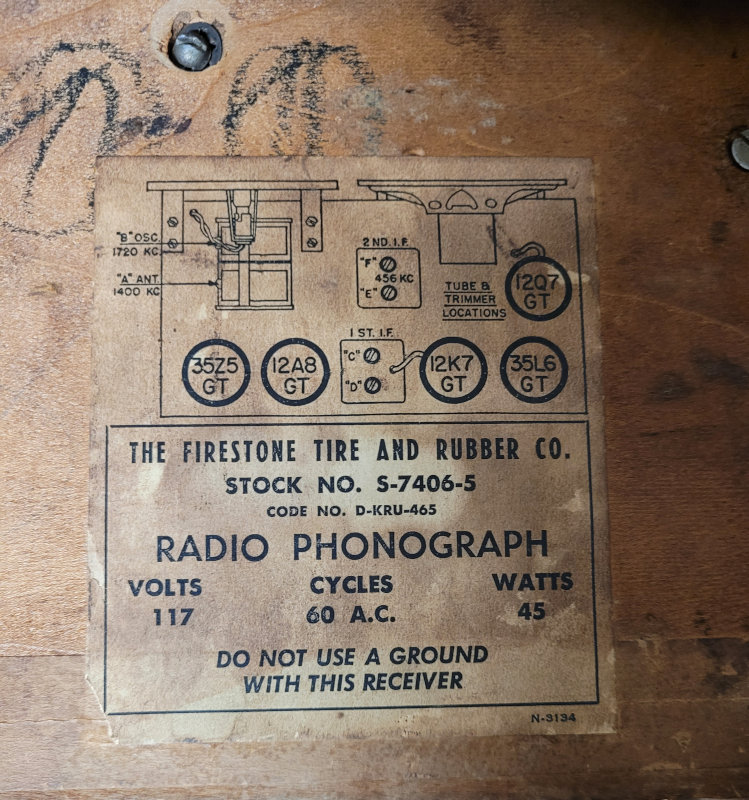
I did some research and it turns out that Firestone — yes, the tire company — made a series of radios and phonographs in the 1940s and 50s. This particular model is the Firestone Air Chief S-7406-5.

Old label inside the Firestone radio phonograph
They even tell you what tubes you need when it’s time to replace them. How nice.

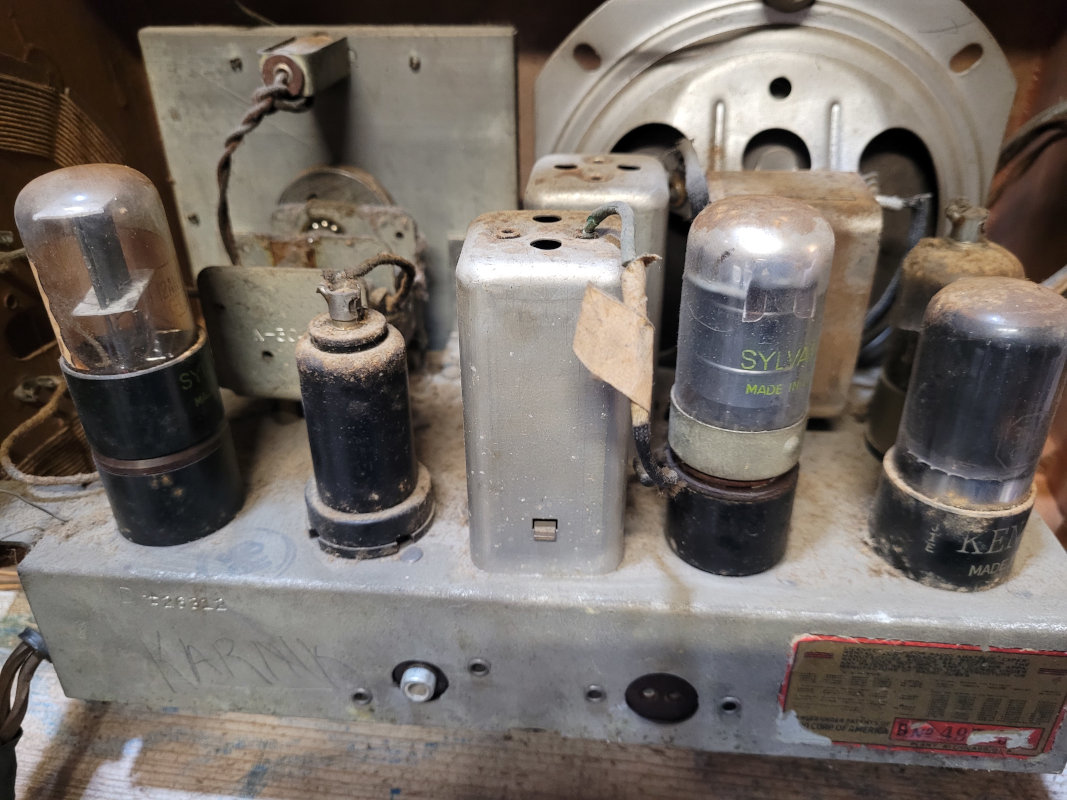
This appliance came out before the age of transistors, so the radio is powered by tubes.

Radio tubes inside a radio
Look, it’s The Dusty Tubes, my favorite band.

I don’t have a tube tester, so to be on the safe side I just ordered all the tubes in the set. It’s amazing what you can find online these days.

I still haven’t plugged it in and turned it on because the power cord is pretty messed up. I’ll have to replace that for sure. And the motor for the phonograph needs a little cleaning up and lubrication — which I will also need when this project is done. The plastic cover over the dial was warped out of its mind as well, but thankfully the dial itself still looks pretty. Gotta love art deco.

However, the major part of this restoration process will be replacing all the capacitors, or “re-capping” it.

Old capacitors inside a radio

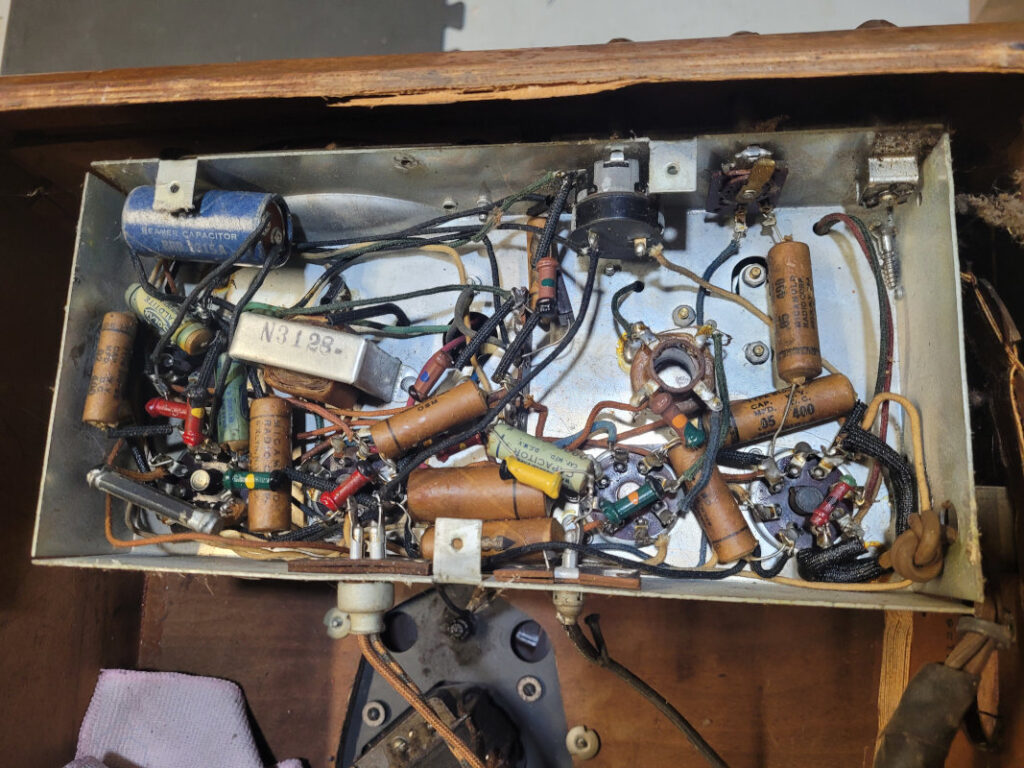
The capacitors, which store an electrical charge when current is passed through them, were mostly made of paper back in the day. They didn’t last very long. Rather than testing each one, I’m going to replace them all with new polymer ones. There’s a lot to get into with capacitors and I won’t bore you with it here. If you really are interested, there’s a great tutorial on antiqueradio.org.

This project is in progress, and I’ll update when I have something to show for my work. In other words, when it turns on.


4 responses to “Restoring a 1940s Firestone Radio Phonograph”

  1. Scott Lane Avatar
    Scott Lane

    I just was given the same Firestone Air Chief radio/phonograph as you are starting to restore. How’s it coming along?

    1. revivenrepair_00is8x Avatar

      Oy, I wish I was further along than I imagined at this point. I have all the new capacitors and other parts, but I’ve been pulled away into other projects and… life.

      Is yours working?

  2. Rick Gilbert Avatar
    Rick Gilbert

    It’s helpful to read how you are approaching restoring the radio. I have a elderly friend who has the Fire Chief S-7402-1 radio. Bakelite case, but very similar innards. I’m trying to restore it for him. This radio was used a lot. Dust encrusted on the tube side of the chassis, and at least a couple of the wax/paper caps are unreadable. I may be able to scrape off some discoloration and see the values, but I’m trying to be cautious at this point. There is an asbestos mat at the bottom of the bakelite shell that provides heat insulation between the chassis & the shell. It appears sound, but I want to wear a mask and have the chassis outside while I mess with cleaning up the underside.

    I’m also having trouble finding a replacement on/off-volume control knob. The shaft is flush with the cabinet, so the knob has to have a “neck” to slip through the cabinet and fit over the shaft.

    1. DJ Billings Avatar
      DJ Billings

      Have you considered 3D printing a new one? I’m doing that with another radio phonograph where the dial has a big chunk out of it. The neck piece seems to be the hardest part. My local library has a 3D printer and it’s a couple bucks every time they print a new one for me to test. The staff is also very helpful. It’s definitely cheaper than buying and maintaining my own 3D printer!

Leave a Reply

Your email address will not be published. Required fields are marked *