It’s hard for me to resist free things, especially when they are formerly-expensive free things. But when Jenni and I passed an old farmhouse table on the side of the road in our neighborhood, I had to say no for a few reasons:
- It was huge. I didn’t know if it would fit in our dining area.
- It was heavy. Like, big city bus heavy.
- It probably doesn’t have all the — oh, wait. It does have all the hardware.
After initially passing it up, we saw it again a few days later. Still sitting there, calling to us. And it was starting to drizzle. Long story short, I got the van, called for help (our 17-year old son), and we brought it all home. And there it stayed, in the van, for several weeks. It was December, after all.
In March I decided it was time to start working on the table. And a lot of work it was going to be.
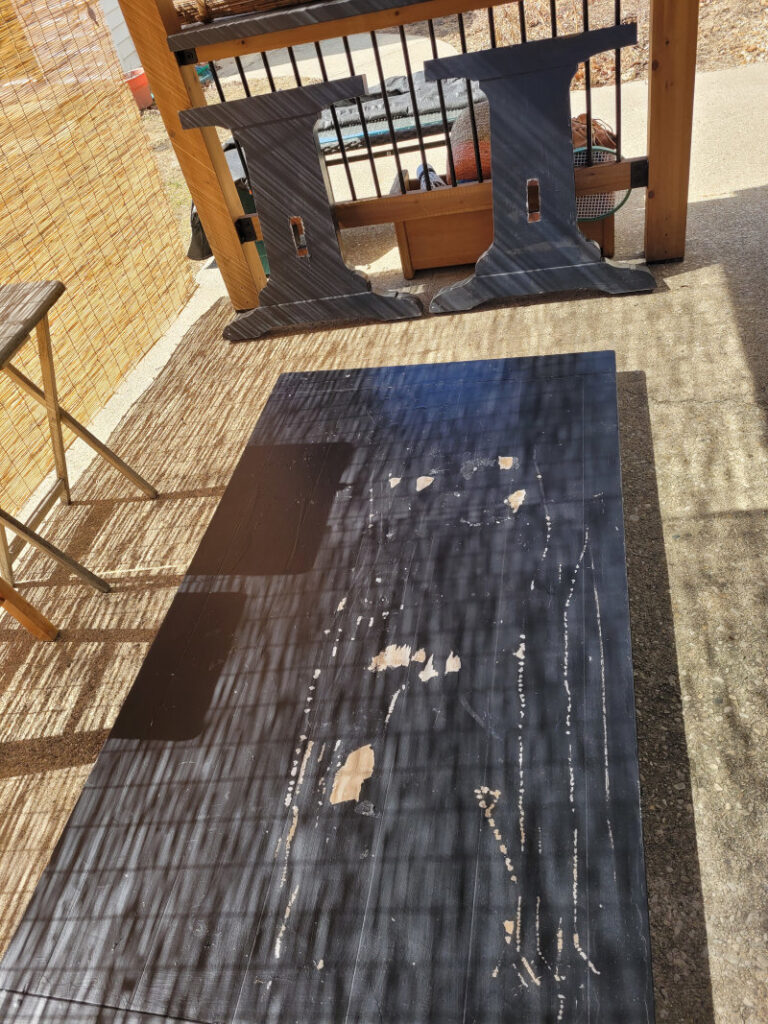
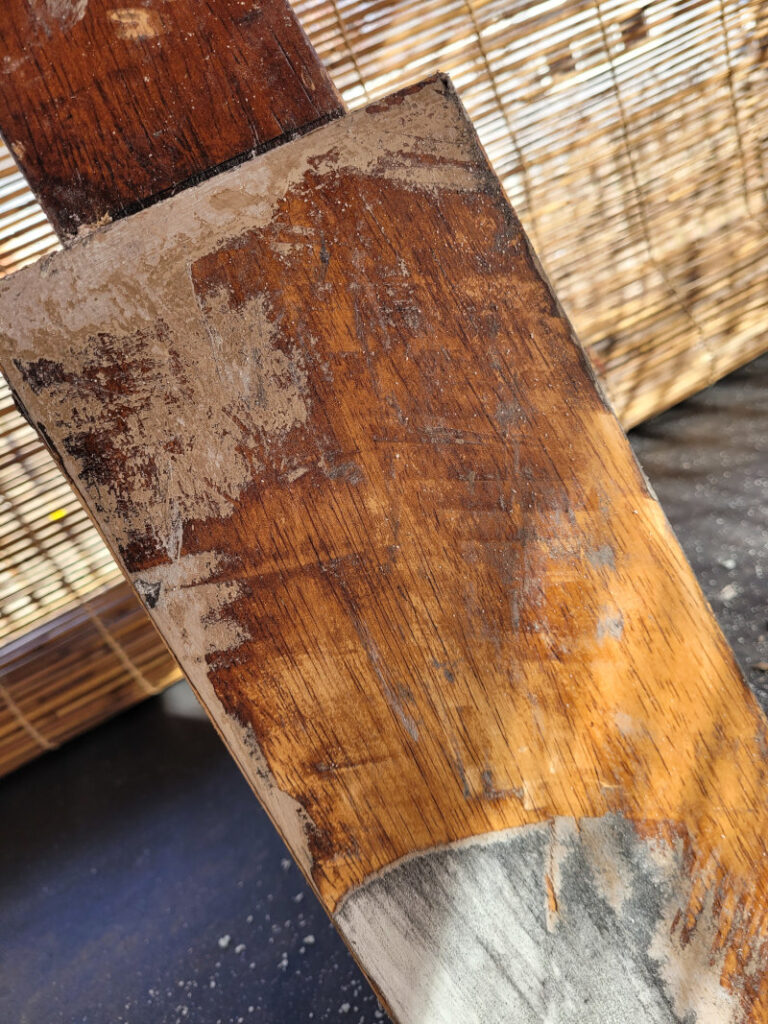
After spending more time inspecting the piece, I was happy to find that it was all real wood. I don’t typically like to restore laminates, it’s a personal thing. What kind of wood? I couldn’t tell because the entire table had been painted over at least three times, the last layer being a thick, black latex paint. But looking inside the trestle openings, I could see what looked like possibly maple peeking through.
In the past I’ve sanded old paint and varnish off of furniture — and paid the price with shoulder and arm pain, even with my rotary sander. With the thick layers of paint here, I decided to use a chemical stripper and save my body for light sanding later.
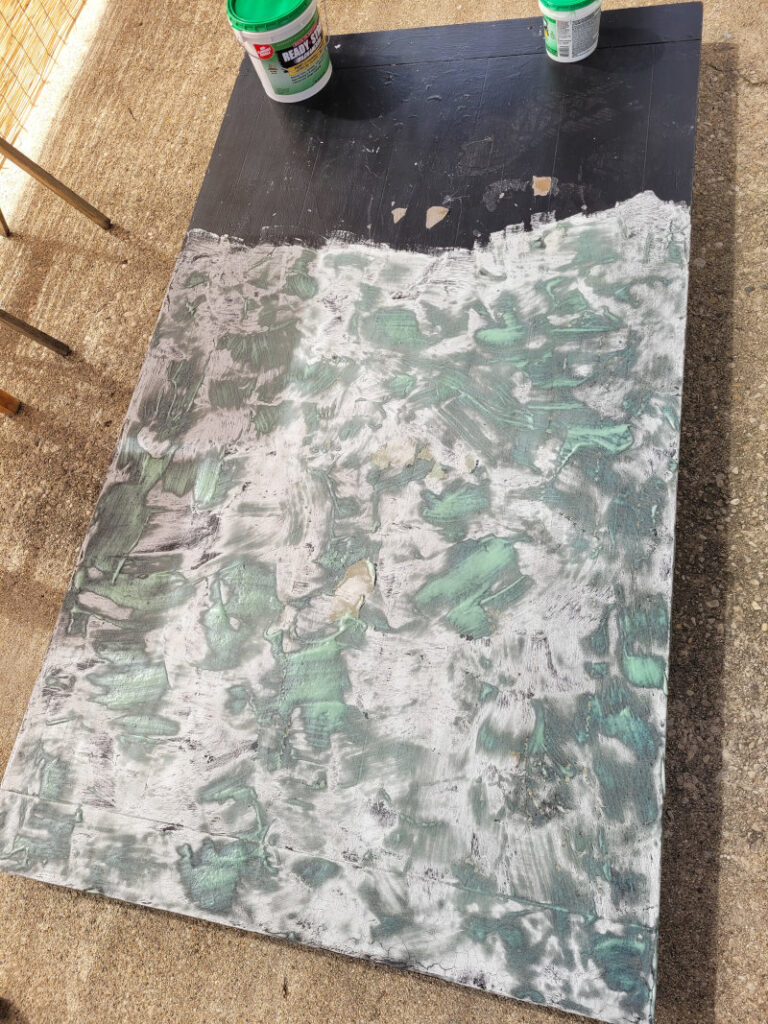
I’m not crazy about chemicals, so I used Back to Nature Ready Strip, which is at least better for the environment. And when it came to scraping off the layers, it was like a dream.
Okay, it was like a daydream. Scraping was at least easier than sanding.
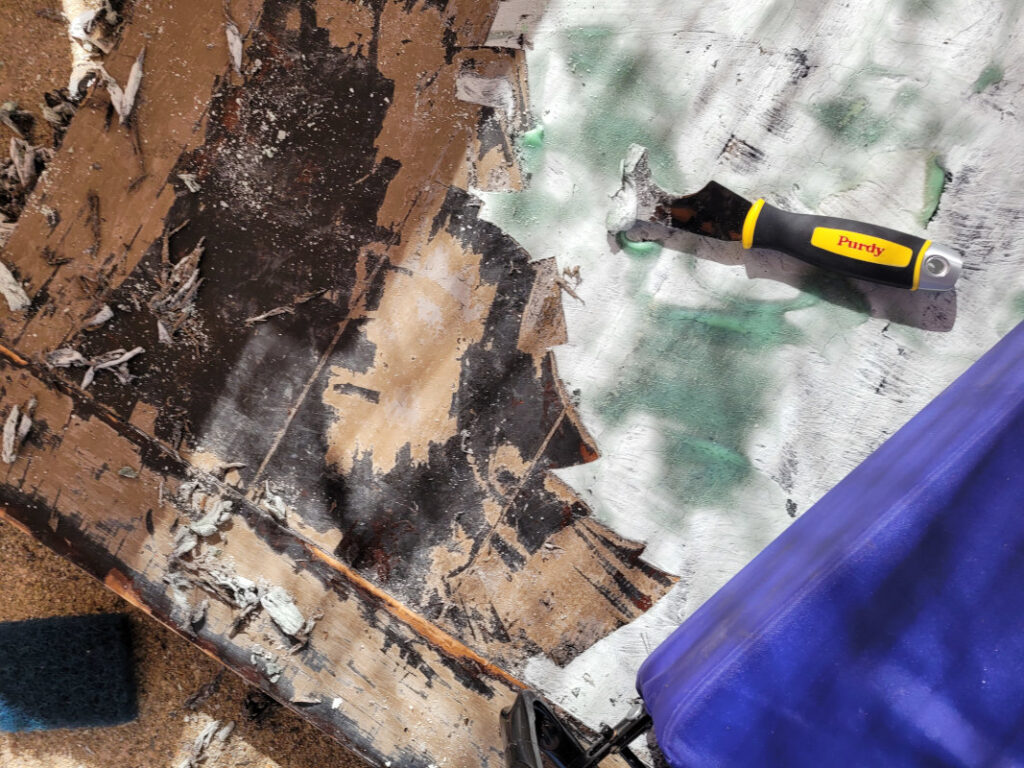
I still couldn’t quite tell what kind of wood it was. But I could see it was a beautiful honey color, and I wondered why anyone would cover it all up with latex paint. Some things are a mystery to me, but I understand that everyone has their taste and their story. I tried my best to reserve judgement.
Once the scraping was done, I noticed that the honey color was likely a varnish. Underneath that, the raw wood was exposed and I discovered that it was likely an ash veneer on top of what was probably pine or oak. I only guessed oak, because it was so dense and heavy.
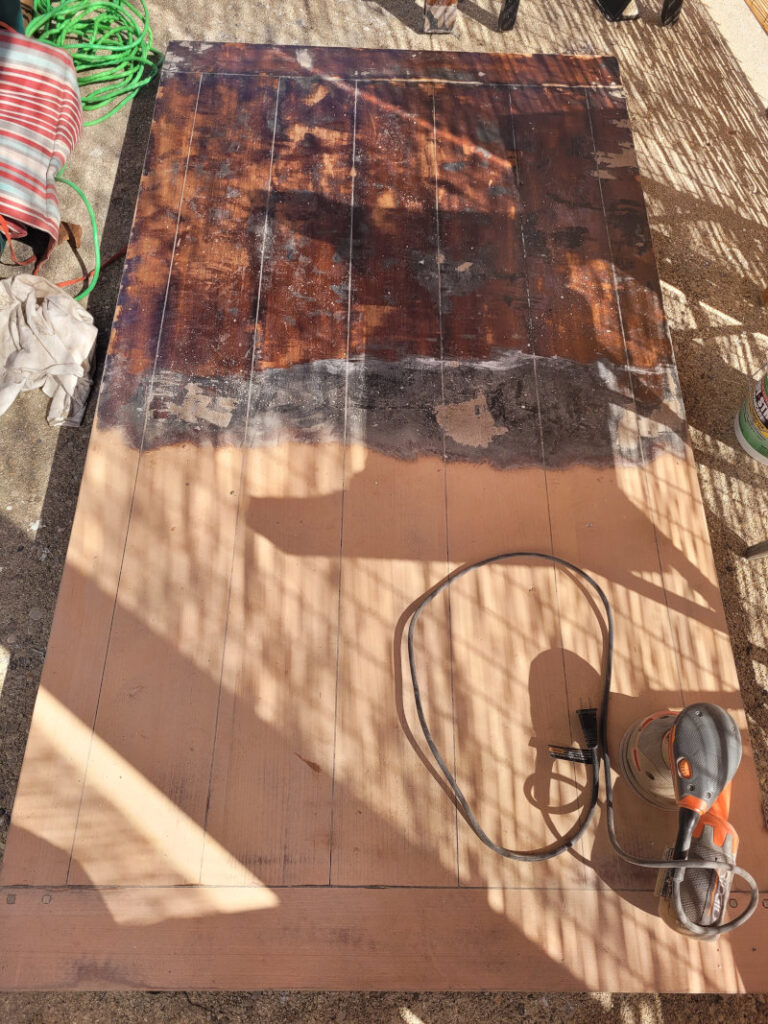
After the stripping was done, I still had to use my sander to get down to the raw wood. At least it was easier and faster.
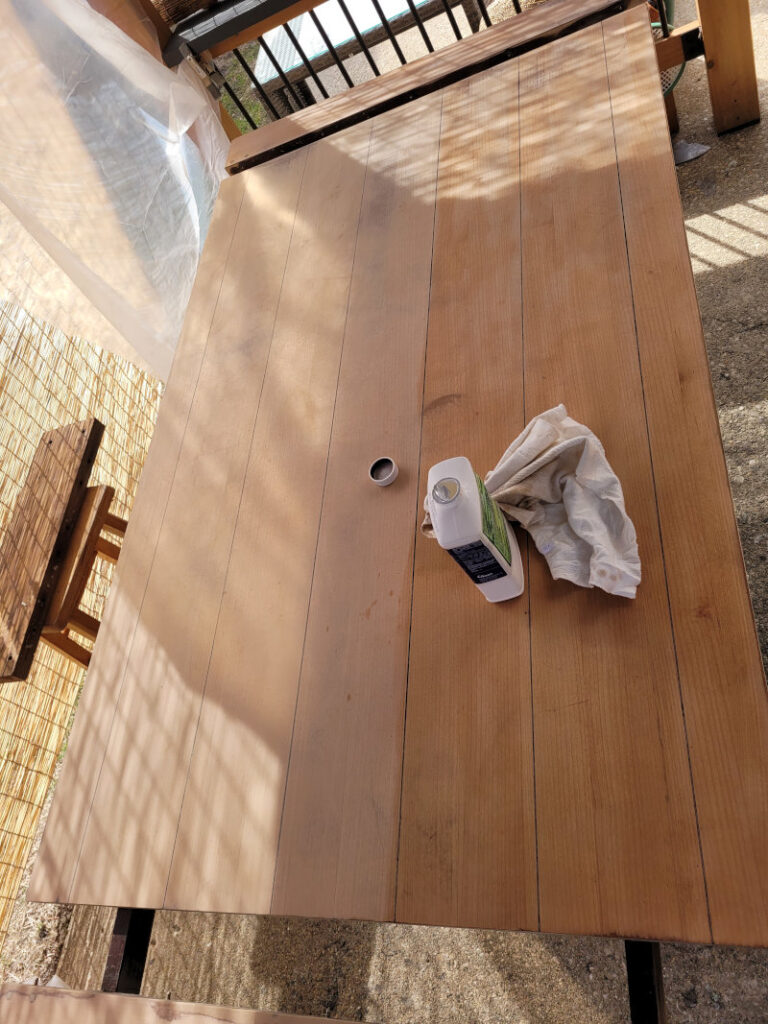
The table had pull-out sections at both ends to put in leaves. We didn’t have them, but the table was so huge I don’t think we’ll ever be able to use them anyway. There were a few areas where the veneer was damaged and very thin, so I had to be super careful not to sand too much in those areas.

Cleaning was very satisfying. There were some spots that I just couldn’t get cleared because I risked damaging the wood. But hey, it’s an old table and it was free.
I put a light coat of pecan varnish on it, mostly for protection. Then I added a coat of polyurethane to protect it even more.
After hiring a crew of ten large men and an elephant to heft it into the house (kidding), I assembled it in our dining nook. As I mentioned, it had all the hardware, and the people giving it away had kindly placed it all in a heavy duty Ziplock bag. Bonus!
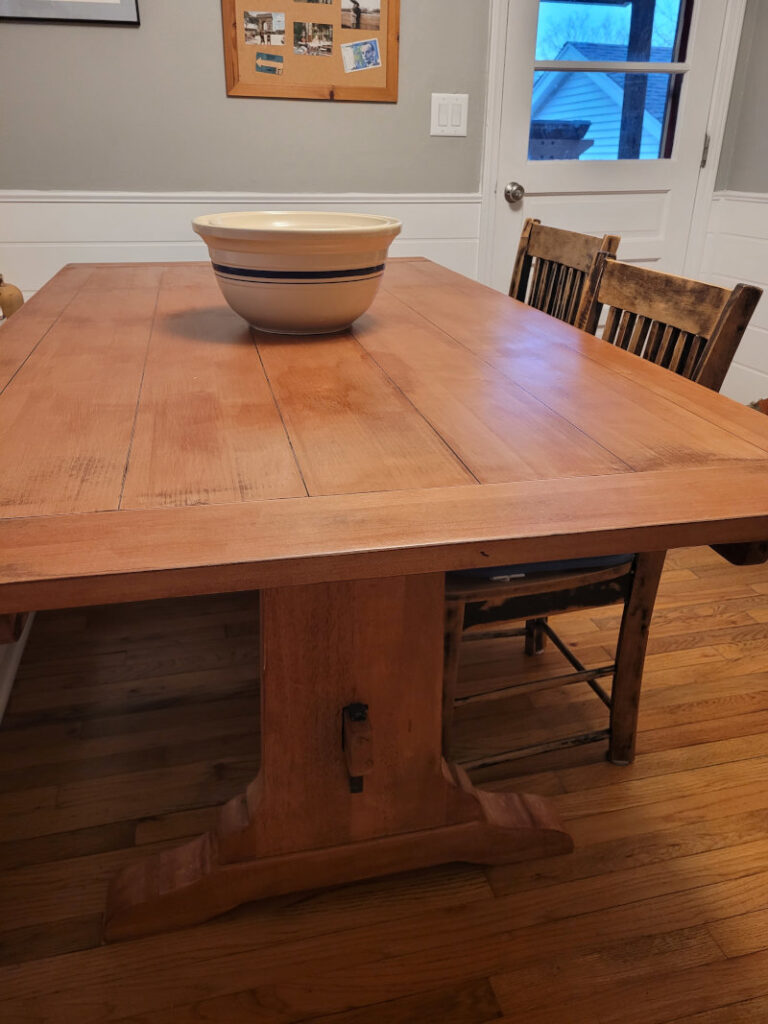
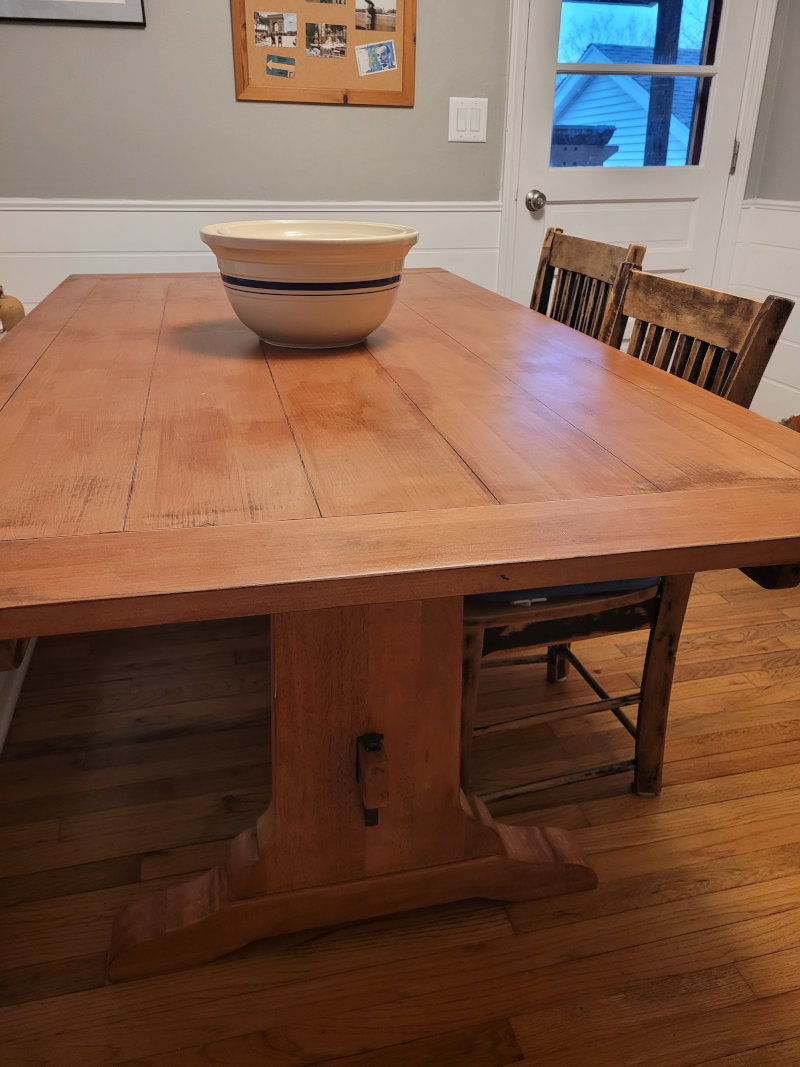
It still has a few odd spots on top, but I’m thrilled with the results. I love rescuing real wood pieces and I’ve learned to expect the finished product to have a lot of character. After doing some research, I found similar tables online that go for $800 new. We got this one for under $40 in materials and some hard work.
Take a walk around your neighborhood. You never know what you might find.
Leave a Reply